イメージのタグ付け、送信、取得
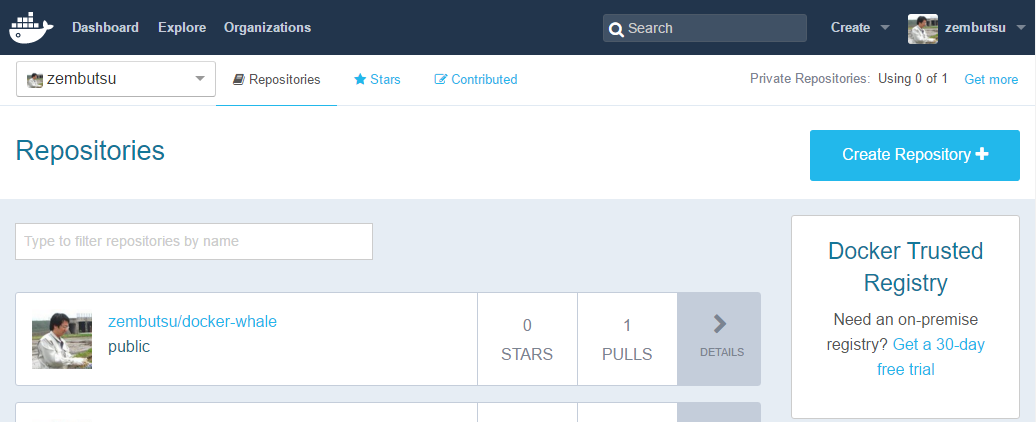
このセクションでは docker-whale イメージにタグを付け、先ほど作成した自分のリポジトリにイメージを送信します。作業が後は、自分の新しいイメージをリポジトリから取得できるか確認します。
ステップ1:イメージのタグ付けと送信
ターミナルを開いていなければ、今から開きます。
- Lanchpad を開き、 Docker Quickstart Terminal アイコンを探します。
- アイコンをクリックし、 Docker クイックスタート・ターミナルを起動します。
- Docker クイックスタート・ターミナルのウインドウのプロンプトにカーソルをあわせます。
docker imageを入力し、現在手許にあるイメージの一覧を表示します。
$ docker images
REPOSITORY           TAG          IMAGE ID            CREATED             VIRTUAL SIZE
docker-whale         latest       7d9495d03763        38 minutes ago      273.7 MB
<none>               <none>       5dac217f722c        45 minutes ago      273.7 MB
docker/whalesay      latest       fb434121fc77        4 hours ago         247 MB
hello-world          latest       91c95931e552        5 weeks ago         910 B
docker-whaleイメージのイメージ IDを確認します。
この例では ID は 7d9495d03763 です。
現時点の REPOSITORY にあるリポジトリ名は docker-whale ですが、名前空間(namespace)がありません。名前空間は Docker Hub 上の自分のアカウントに関連付いています。この名前空間は自分の Docker Hub アカウント名と同じです。そのため、イメージを 自分のアカウント名/docker-whale に名称変更する必要があります。
docker tagコマンドとイメージ IDを指定し、docker-whaleイメージをタグ付けします。
入力するコマンドは、次のような意味があります。

もちろん、アカウント名は自分自身のものです。そのため、イメージ ID やアカウント名は自分のものを入力し、リターンキーを押します。
$ docker tag 7d9495d03763 maryatdocker/docker-whale:latest
docker imagesコマンドをもう一度実行して、新しくタグ付けされたイメージがあるかどうか確認します。
$ docker images
REPOSITORY                  TAG       IMAGE ID        CREATED          VIRTUAL SIZE
maryatdocker/docker-whale   latest    7d9495d03763    5 minutes ago    273.7 MB
docker-whale                latest    7d9495d03763    2 hours ago      273.7 MB
<none>                      <none>    5dac217f722c    5 hours ago      273.7 MB
docker/whalesay             latest    fb434121fc77    5 hours ago      247 MB
hello-world                 latest    91c95931e552    5 weeks ago      910 B
- コマンドライン上で
docker loginコマンドを使い Docker Hub にログインします。
ログインコマンドの書式は次の通りです:
docker login --username=yourhubusername --email=youremail@company.com
入力を促すプロンプトが表示された、パスワードを入力してエンターを押します。実行例:
$ docker login --username=maryatdocker --email=mary@docker.com
Password:
WARNING: login credentials saved in C:\Users\sven\.docker\config.json
Login Succeeded
docker pushコマンドを実行し、自分のイメージをリポジトリに送信します。
$ docker push maryatdocker/docker-whale
    The push refers to a repository [maryatdocker/docker-whale] (len: 1)
    7d9495d03763: Image already exists
    c81071adeeb5: Image successfully pushed
    eb06e47a01d2: Image successfully pushed
    fb434121fc77: Image successfully pushed
    5d5bd9951e26: Image successfully pushed
    99da72cfe067: Image successfully pushed
    1722f41ddcb5: Image successfully pushed
    5b74edbcaa5b: Image successfully pushed
    676c4a1897e6: Image successfully pushed
    07f8e8c5e660: Image successfully pushed
    37bea4ee0c81: Image successfully pushed
    a82efea989f9: Image successfully pushed
    e9e06b06e14c: Image successfully pushed
    Digest: sha256:ad89e88beb7dc73bf55d456e2c600e0a39dd6c9500d7cd8d1025626c4b985011
- 自分の Docker Hub のプロフィールページに戻ると、新しいイメージの情報が表示されます。

ステップ2:新しいイメージの取得
この最後のセクションでは、Docker Hub に送信(push)したイメージを取得(pull)します。作業を進める前に、これまでローカルマシン上で作成したオリジナルのイメージを削除します。マシン上にオリジナルのイメージを残しておいたままでは、Docker は Docker Hub からイメージを取得しません。これは両方のイメージが同一と認識されるためです。
- Docker クイックスタート・ターミナルのウインドウ上のプロンプトにカーソルを合わせます。
docker imagesを入力し、ローカルマシン上にあるイメージの一覧を表示します。
$ docker images
REPOSITORY                  TAG       IMAGE ID        CREATED          VIRTUAL SIZE
maryatdocker/docker-whale   latest    7d9495d03763    5 minutes ago    273.7 MB
docker-whale                latest    7d9495d03763    2 hours ago      273.7 MB
<none>                      <none>    5dac217f722c    5 hours ago      273.7 MB
docker/whalesay             latest    fb434121fc77    5 hours ago      247 MB
hello-world                 latest    91c95931e552    5 weeks ago      910 B
テストを正しく行うため、ローカルのシステム上から maryatdocker/docker-whale と docker-whale イメージを削除します。次の docker pull コマンドを実行する前に、リポジトリからイメージを削除します。
docker rmiコマンドを使い、maryatdocker/docker-whaleとdocker-whaleイメージを削除します。
イメージを削除するにはイメージ ID かイメージ名を使います。
$ docker rmi -f 7d9495d03763
$ docker rmi -f docker-whale
docker runコマンドを使い、リポジトリから新しいイメージの取得と読み込みます。
コマンド実行時、ユーザ名には Docker Hub 上の自分の名前を指定します。
docker run 自分のユーザ名/docker-whale
イメージがローカルホスト上にないため、Docker はイメージをダウンロードします。
 $ docker run maryatdocker/docker-whale
Unable to find image 'maryatdocker/docker-whale:latest' locally
latest: Pulling from maryatdocker/docker-whale
eb06e47a01d2: Pull complete
c81071adeeb5: Pull complete
7d9495d03763: Already exists
e9e06b06e14c: Already exists
a82efea989f9: Already exists
37bea4ee0c81: Already exists
07f8e8c5e660: Already exists
676c4a1897e6: Already exists
5b74edbcaa5b: Already exists
1722f41ddcb5: Already exists
99da72cfe067: Already exists
5d5bd9951e26: Already exists
fb434121fc77: Already exists
Digest: sha256:ad89e88beb7dc73bf55d456e2c600e0a39dd6c9500d7cd8d1025626c4b985011
Status: Downloaded newer image for maryatdocker/docker-whale:latest
 ________________________________________
/ Having wandered helplessly into a      \
| blinding snowstorm Sam was greatly     |
| relieved to see a sturdy Saint Bernard |
| dog bounding toward him with the       |
| traditional keg of brandy strapped to  |
| his collar.                            |
|                                        |
| "At last," cried Sam, "man's best      |
\ friend -- and a great big dog, too!"   /
 ----------------------------------------
                \
                 \
                  \
                          ##        .
                    ## ## ##       ==
                 ## ## ## ##      ===
             /""""""""""""""""___/ ===
        ~~~ {~~ ~~~~ ~~~ ~~~~ ~~ ~ /  ===- ~~~
             \______ o          __/
              \    \        __/
                \____\______/
次は何をしますか
これで Docker の基本的なタスクを扱う全てが終了しました。
- Docker をインストールする。
- コンテナでソフトウェアのイメージを実行する。
- Docker Hub 上で興味あるイメージをさがす。
- 自分のマシン上でイメージを実行する。
- 実行するイメージに対する変更を加え、イメージを作成する。
- Docker Hub 上のアカウントとリポジトリの作成。
- 他の人と共有できるよう Docker Hub イメージを送信。
Docker ができることを詳しく知りたくありませんか。次のページから より詳細を学びましょう 。
参考
- Tag, push, and pull your image
- https://docs.docker.com/mac/step_six/